


9 Tips for Great Tile Work
#1: Don't do it yourself.

Tilework is one of those things that might seem simple, but is actually pretty complicated! Having good tile installers is absolutely key, but there are some things that must be thought through ahead of time to make sure it turns out right. Here are a few:
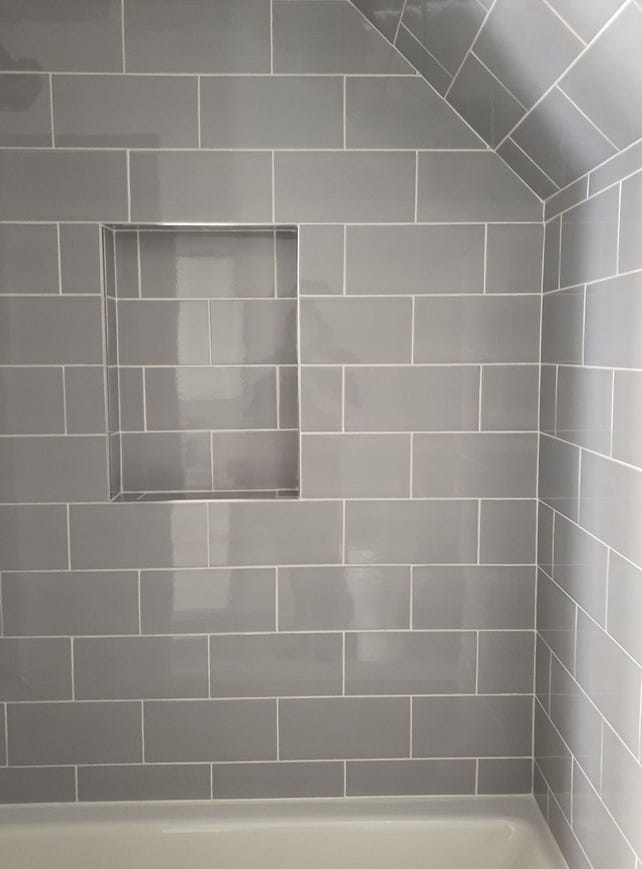
Align the niche with the grout lines. Depending on your tile layout/shape, you can’t do this in both directions, so choose one.
Continue grout lines through the niche; don’t stop and start the tile alignment at the edges of the niche.

Continue those grout lines through the niche. In your drawings, communicate *intent* rather than strictly relying on dimensions. For example, what might matter most is that the niche lines up with grout lines, but that it is also at least 16″ tall. By indicating those parameters on our drawings, the framers [who are building the wall and the niche pocket] and the tile setter knows what we’re trying to do, but are given enough freedom to find the best way to execute it in the field.
Understand angles, and know when geometry will and won’t allow you to align patterns/grout lines, so that you can make smart decisions about what matters and what doesn’t. We wanted a nice crisp line as the tile turned the corner, but we’d lose that as the angled part of the ceiling continued up the wall. We lined up the parts that are at eye level, and let the pattern go after that.

Choose what matters - can’t align everything… Don’t forget the role grout plays in the design! A contrasting grout makes the individual tiles pop, while a matching grout makes the tile read more like a continuous surface. Either can be cool!

Pink tiles with dark gray grout! Don’t obsess too hard about drawing grout lines at actual thickness in drawings and getting toooo nitpicky in layouts…things will change in the field, and tile isn’t perfectly uniform. See note above about communicating intent.
Not every tile is right for every location - generally, you want to have something small/grippy [like penny or small hex tiles] on a shower floor, and you want to use something that doesn’t have a lot of grooves or texture for the kitchen backsplash so it’s easier to clean.
If you’re doing tile on walls or floors you didn’t build - like in a renovation - be prepared for the surfaces to not be completely flat, level, or plumb. Smaller tiles will make navigating those existing conditions easier, whereas a larger tile will “rock” or not lay flat.
Preparation, preparation, preparation! In a proper install, a tile install is completely waterproof *before* tile is even installed. Since it’s pretty much impossible to fix without ripping everything out, make sure your prep is on point.


Tile is one of the most fun and expressive parts of a project – don’t be afraid to branch out and try something new! A stellar install, though, is absolutely key to making any tile look great.
Thank you for reading! I’d love to have your support - please consider subscribing here! You’ll get access to the weekly paid posts, the archive of all free and paid posts, periodic special offers, and the comment sections on posts.